How To Build A Lumber Rack With Storage Bins – The Power Tool Website
Today I want to show you how I built my lumber rack, which has actually made a huge difference in my shop.
Just being able to better organize my stock, plus the extra bins for cut offs, I now operate a much cleaner and organized shop.
And keeping lumber off the garage floor really improves bug and pest control.
I’m going to show you how I built this lumber rack, and if you want to download plans for it, scroll to the bottom of the page and I’ll give you access.
So let’s begin…
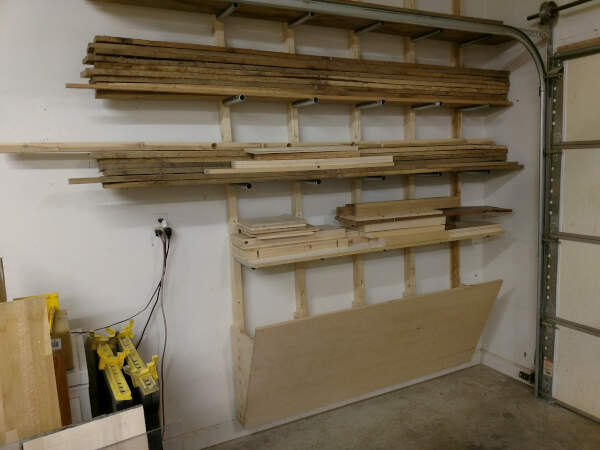
First of all, you’ll need to use dimensions that work with your shop. Things to consider are available depth from the wall, height of your wall, and spacing of your wall studs.
My walls are 10′ tall, with 16″ centered studs, and I have about 16″ of clearance before I get into my garage door.
To start, rip down some 2×6’s to widths of 2-1/2″. These will be your posts, which will end up being 1-1/2″ x 2-1/2″, by whatever length you need depending on the height of your wall.
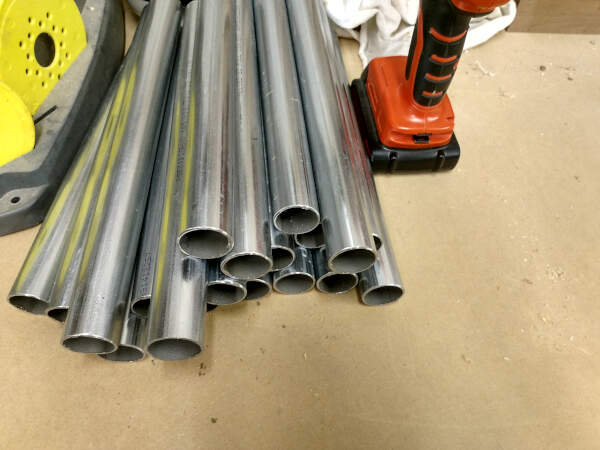
Now cut some conduit or other steel pipe into equal lengths. I used nominal 1″ EMT conduit, you can use 3/4″ pipe as well.
To cut it, use a band saw, a hack saw, a sawzall, or if you have the right blade for the material, a miter saw / chop saw.
For me, I used a battery powered sawzall with a metal cutting blade, making all the pipes 12″ long.
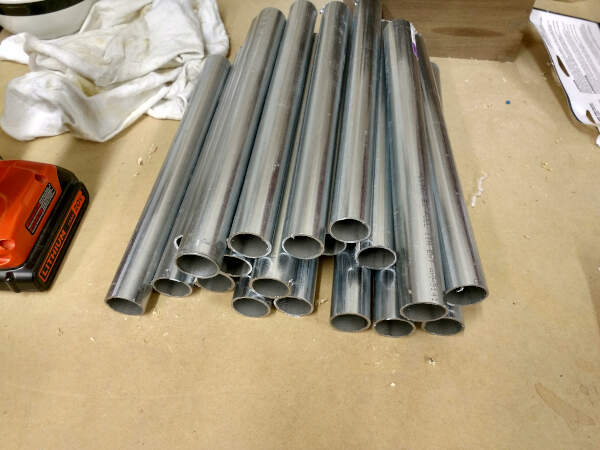
Be sure to clean up the edges with a file, a grinder, or a power sander. I used my stationary combo sander which worked great for EMT conduit.
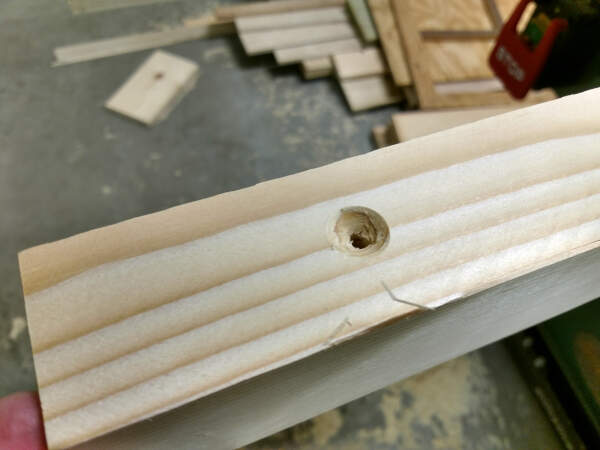
Now depending on the pipe you’re using, find a drill bit that’s the same or slightly larger in diameter.
For me, I had a Forstner bit that was about 3/16″ too large. To compensate I set my drill press up at an angle so the bars will stick out at 90 degrees of the wall.
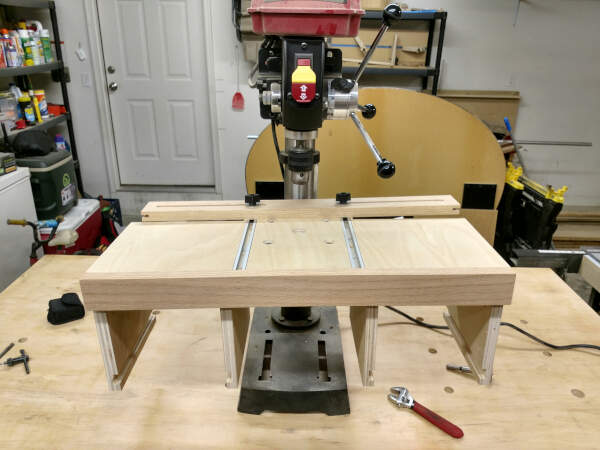
This angle is specific to the depth you’re drilling, and the diameters you’re working with. So test a few angles on a scrap post with the same dimensions as your project posts. Once you find this angle, lock in the drill press good and tight.
You won’t be drilling “through holes”. Instead, you’ll want to leave about 1/4″ of material at the back, so be sure to use the depth stop on your drill press as well.
With all the posts cut to the exact same length, line them up together and use a framing square to mark the hole locations to make sure the elevation of the holes are identical in each post.
Set up a fence for your drill press to keep the bit centered on the posts. I’m using the fence built into my Drill Press Caddy, which you can get plans for here.
Drill the holes about 16″ apart.
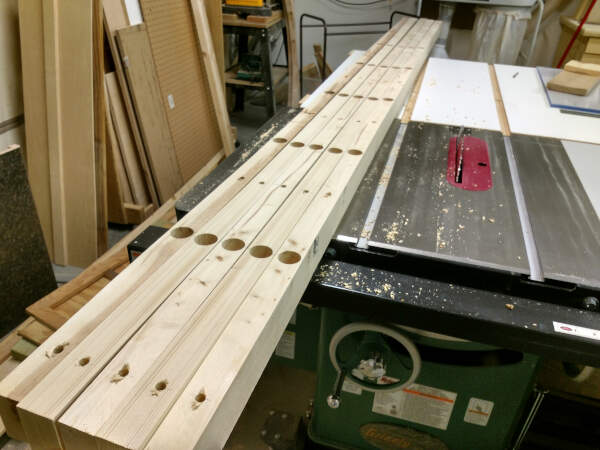
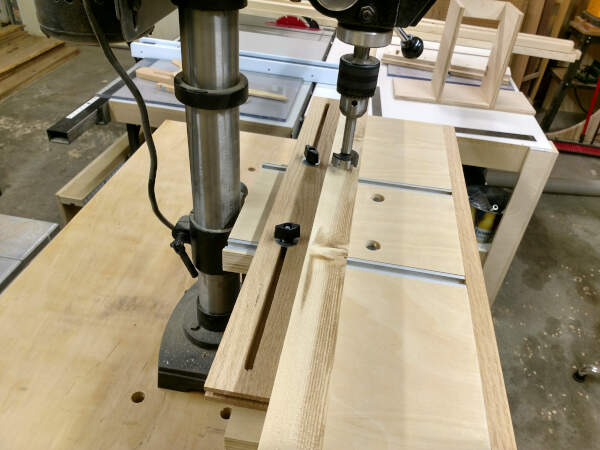
You’ll also want mounting holes drilled along the post. These should be at the top, the bottom, and between each pipe location.
If you’re attaching these posts to drywall, countersink the back of the mounting holes. Otherwise, the drywall may mound up when you’re drill the mounting screws into it. This can push the posts away from the wall.
You’ll also want to drill pocket holes in the bottom of each post, drilled at a downward angle, from the side. These will be used later to secure the base of the bins to the bottom of the posts.
Finally, attach the posts to the wall at your wall studs. Be sure the elevation is the same for them all. Keep them above your baseboard. If you don’t have baseboard, keep them 4 to 6 inches above the floor anyway, so you can keep the space under the bins clean.
Secure them to the wall using large construction screws.
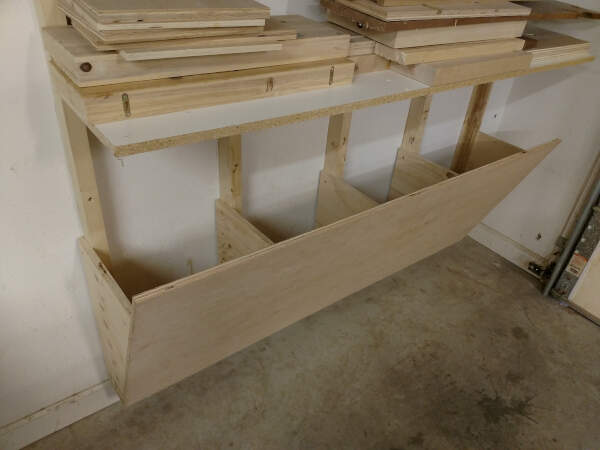
Building the Bins
For the bins you’ll need a full sheet of 3/4″ plywood. I used sanded pine plywood from Lowes.
If you want, you can make each bin individually so you’re not working with such a large piece of heavy plywood.
Related: 5 Tools For Cutting Plywood
But as for me, I made the front piece span the entire width of the posts, and is about 28″ tall.
The front should protrude 3/4″ past each side of the outside posts on your wall.
You can then hold this piece against the posts and mark their exact location, then install the dividers for the bins so they will slide right up against the side of each post.
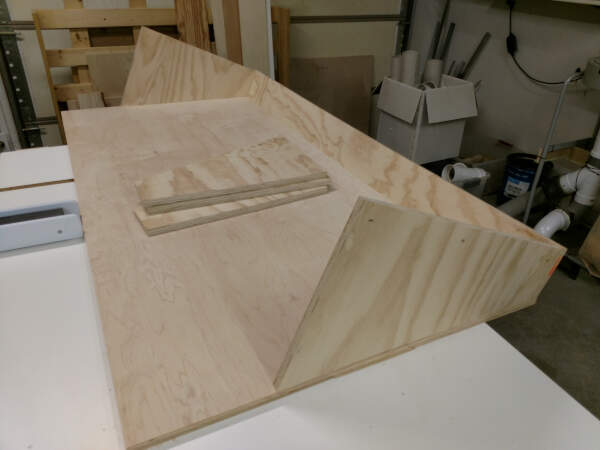
These dividers are square at 2 corners, and angled on the opposite side, that way the bins lean out away from the wall.
Cut the base for the bins about 5 inches wide, the same length as the front, and with a bevel on one side to match the angle of the uprights.
Attach the dividers, and the base, to the large front piece, using 1-1/4″ pocket screws.
Predrill some holes along the back edge of the dividers, so you can secure them to the posts.
Get someone to help you hold this bad boy in place, and start sinking screws into the pocket holes at the bottom of the posts, into the base of the bins-assembly. This will hold the bins in place and make the rest much easier.
Now sink ~1-3/4″ construction screws through each divider, into each post.
Now you can insert all your pipes and start rackin’ lumber in your new amazing lumber rack!
Go here to get the detailed PDF plans.
Have fun, and be safe!