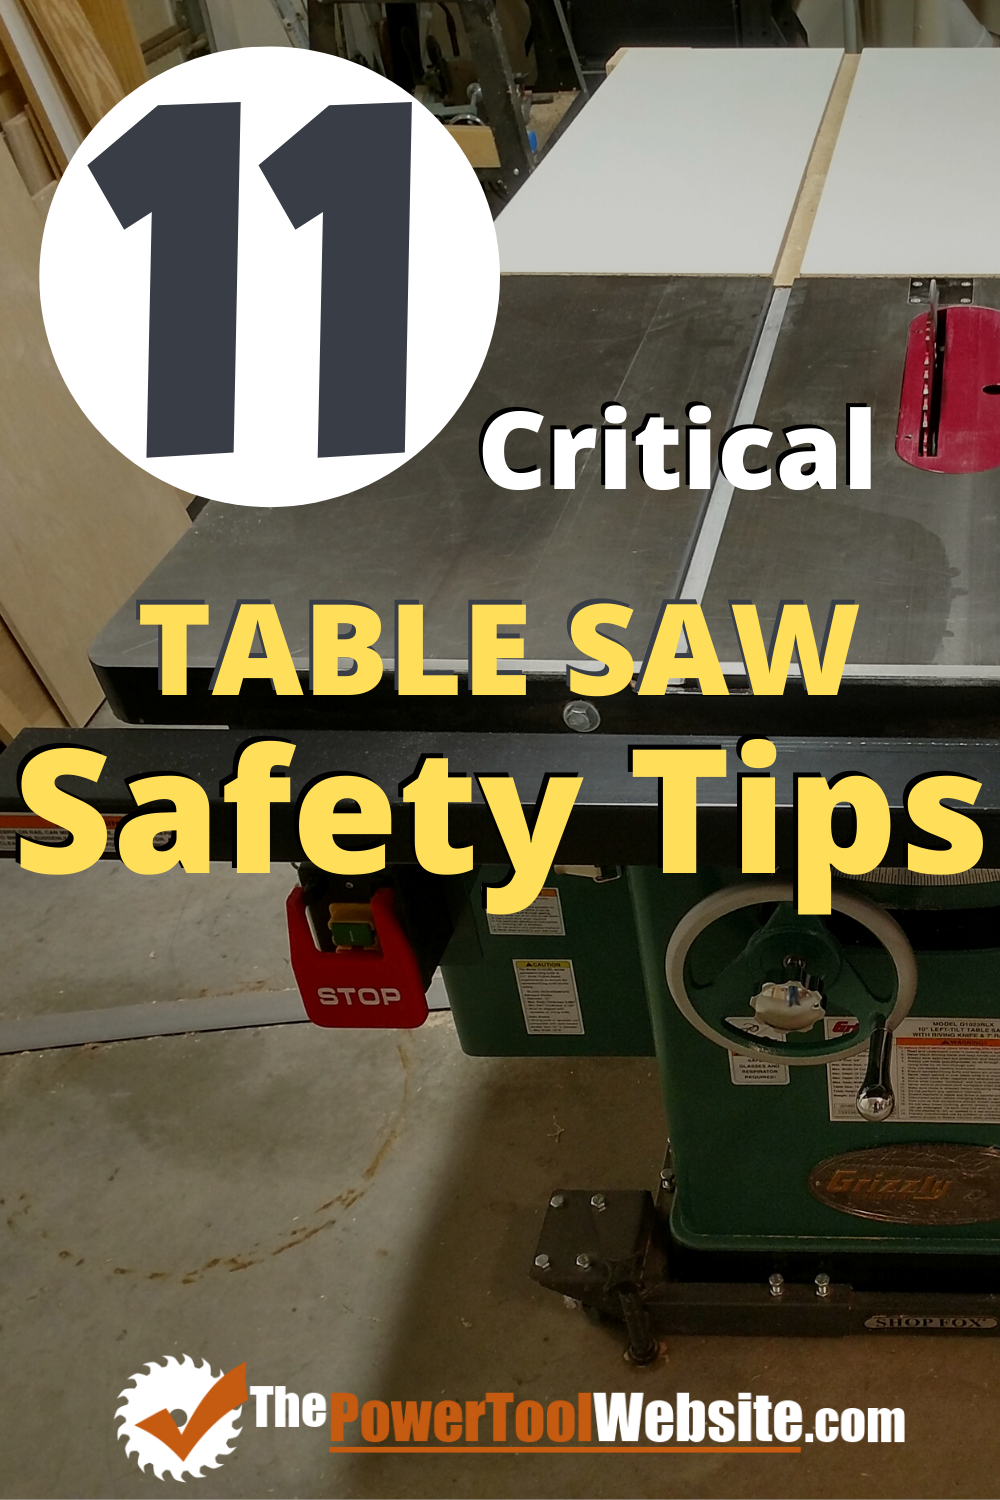
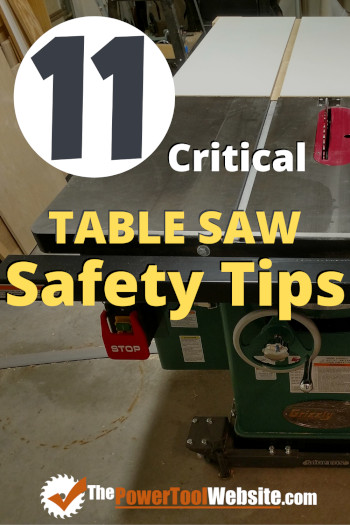
11 Critical Table Saw Safety Tips For All Woodworkers
The table saw can be intimidating, especially for beginner woodworkers that aren’t accustomed to using such a powerful tool. That’s why table saw safety is so important, and you should take the time to understand some best practices in order to greatly reduce the chance of getting injured in your wood shop.
On this page you’ll find a list of critical table saw safety tips that all woodworkers should follow. But I don’t want to confuse anyone, so let me explain some of the jargon associated with this topic first.
Table Saw Anatomy and Basic Cuts
Table saw insert – This is the ‘throat plate’, or the removable platform that immediately surrounds your exposed blade.
Miter Slot – Groove in the table on both sides of the blade, running parallel with the blade and the rip fence.
Rip Fence – This is the long fence that runs parallel to the blade and is adjustable side to side.
Miter Gauge – This accessory rides in one of your miter slots and supports a board perpendicular to the blade (or at different angles depending on how the gauge is adjusted).
Rip Cut – AKA ripping, it’s a cut made through the length of the board. Uses your rip fence for support.
Cross Cut – A cut made across the width of the board. Uses your miter gauge for support.
For a more complete guide on understanding your table saw and it’s components, see Table Saw 101.
Table Saw Safety – Understanding The Main Risk
Please understand this one thing if nothing else – Kickback is the biggest form of table saw injuries (statistics on this are posted online from multiple sources).
If you can competently avoid kickback, your chances for injury are drastically reduced. So first let me explain what it is.
Kickback is when a cut-off is grabbed by the blade and thrown back in your direction. That ‘projectile’ can be moving fast enough to seriously hurt you, or at minimum, damage something in your shop.
IMPORTANT – The only form of injury from kickback is not from the projectile. It’s also the blade, because the movement of a piece being kicked back can direct your hand right into the blade. This is demonstrated in a video below.
But please don’t let this scare you. Kickback is easily avoidable if you follow the table saw safety advice on this page.
With that, I will now explain what I believe to be the 12 most critical safety tips when using your table saw.
1. Wear Safety Glasses
God only gave you 2 eyes, so it would be wise to keep them safe. Eye protection is the most obvious and basic protection we should all be using, anytime there’s a risk of debris flying through the air.
All it takes is one eye injury and your life could be drastically changed forever. Think about that every time you step into your shop.
2. Do Not Wear Gloves
Let’s be honest. Cut proof gloves are not going to stop a table saw blade from doing its job, which is to cut through whatever it touches.
So if you can understand that there’s no benefit, then the drawbacks should make it overtly obvious that gloves have no place with your table saw.
First, you lose most of your tactile sense when wearing gloves. This means you cannot feel the board, meaning you can’t respond to it’s movements as quickly or accurately.
Second, you may lose grip, and you may not notice. If your gloved finger is sliding along the board, can you even tell, or does it feel like you’re still pushing?
Third, the fabric in cut proof gloves is very strong. So if you happen to get part of the glove into the blade, there’s a chance a blade tooth will grab the material and pull your hand right into the blade.
Enough said.
3. Use Your Riving Knife or Splitter
This accessory (provided with all new table saws) is one of the biggest improvements made for table saw safety.
Here’s a riving knife:
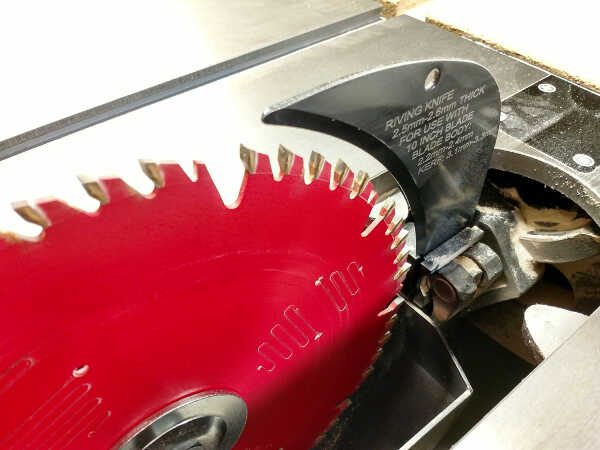
It’s the device behind the blade that is the same thickness (or slightly less) than the blade itself.
It separates the 2 final pieces as the cut is completed.
A variation of this is the splitter (or spreader), which performs similarly, but it is taller than the blade, and may support attachments like this one:
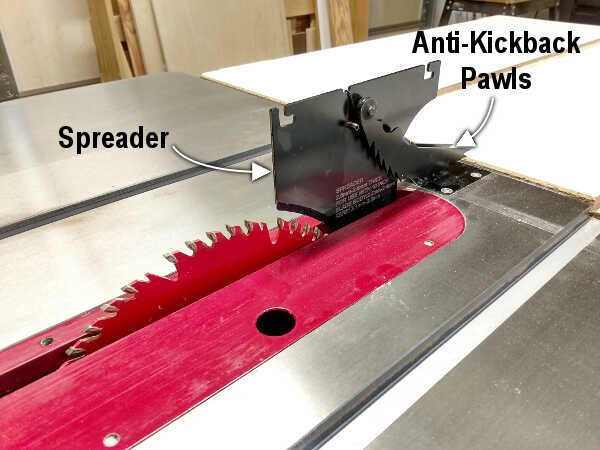
These devices all serve a very important purpose. And that is to greatly reduce the chance for kickback.
This is because kickback generally would only happen when a piece of wood gets wedged against the back of the blade, not the front. And if you have a riving knife in place, that stops the board from rotating and getting into the back of the blade.
So if possible, always always always use your riving knife (or splitter) when making cuts on your table saw.
Here’s a 5 minute video of a guy (not me!) demonstrating real life kick back, by rotating his work piece at the back of the blade, which would be impossible if you use your riving knife:
4. Use Proper Positioning and Stance
When using your table saw, you should have a solid, stable footing. This means don’t stand with your feet together, or lean to one side.
Also, position yourself to the side of the blade, not directly behind it. This way you’re not directly in the line of fire should something go wrong and kickback occurs.
And finally, don’t make a cut if you feel the positioning of your body or your arms are awkward and unnatural. If you feel that way before you begin the cut, take a step back and rethink it.
5. Only Cut Safe Boards
Table saw safety is not only about you and the tool, it’s also about the boards you cut.
Not every board is made the same. Some have twist, others have warp. Some have rough or irregular edges, others have knots. Some have variations of all the above.
The table saw is made to cut a board that lays flat. It also prefers a board that runs flat against the rip fence, or can be held securely against the miter gauge.
If you have a board that doesn’t meet these criteria, you could be asking for trouble, in the way of pinched boards, burning, and possibly kickback.
And even something as simple as a knot can be problematic. Depending on where the knot is positioned through the cut, it could come dislodged and become a projectile. Keep that in mind – it’s best to avoid cutting through or near a knot.
6. Use A Pushing Mechanism
When your fence is only 3 or 4 inches from the blade, it’s best to use a pushing mechanism to push the board through the cut.
That’s typically done with a push stick, or a push shoe. These are tools that allow you to push the board through the cut while keeping your hands away from the blade.
Here’s an example of a combo push shoe / push stick I designed myself:
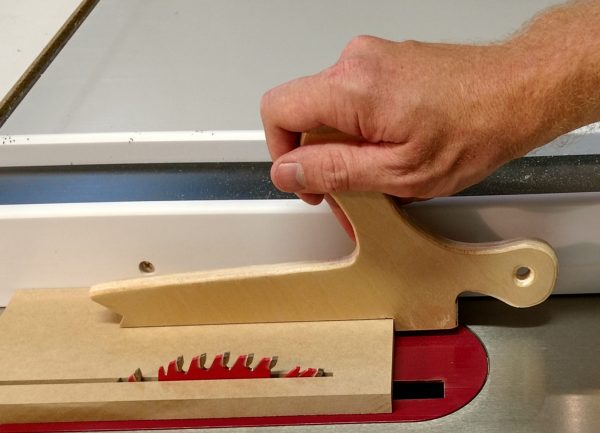
If you’d like the template for my combo push stick, subscribe at the bottom of this page and I’ll email it to you.
Another option is a push block. These are more stable and have a lower center of gravity, reducing the chance of tipping during use.
Here’s an example of my own push block design, which works great for cutting thin strips safely, but can also be used for most standard ripping operations.
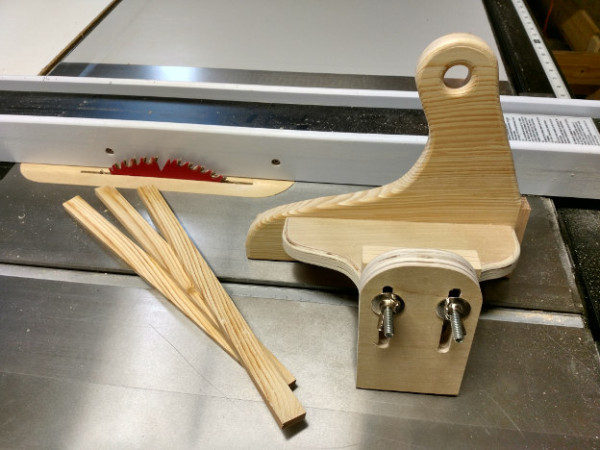
You can get plans for this push block here.
7. Apply The Correct Pressure Through The Cut
You’ll need to apply correct pressure to the workpiece as it’s being fed through the cut.
This pressure should be in 3 directions – down against the table, sideways against the fence, and forward through the cut.
It doesn’t take a lot of pressure, just enough to keep the board in a straight, secure path for the duration, and firmly against the fence.
8. Use Good Follow-Through
With table saw safety, your form is very important. Just remember this: your cut is not complete until the piece between the blade and fence has moved completely past the blade.
Read that again if you need to.
If you remove your right hand (or push stick) once the board is completely cut, but while the right-side piece is still alongside the blade, it becomes a risk.
That piece is now a loose piece of wood that can be wedged and thrown back if a tooth happens to grab it while spinning.
So you should use what’s called good follow-through, and push that piece completely past the blade before stopping.
9. Get A Zero Clearance Table Saw Insert
Sometimes there are small pieces being cut from the board, and sometimes these small pieces tend to fall down into your factory insert next to the blade. This can potentially be risky.
That piece will probably just get wedged against the blade and make a rubbing sound, and maybe get a little burnt.
But there’s a possibility that the piece get’s dropped and wedged at the back of the blade. This can result in a form of kickback.
The solution to this is to use a zero-clearance table saw insert when cutting off small slivers of wood like this. The trick is to find one that also works with your riving knife. Your table saw’s manufacturer should have one available (for some types of saws).
You can also make your own zero clearance table saw inserts. << This particular design does allow for the use of a riving knife.
10. Use Common Sense
Using common sense in the shop is a must-have skill for woodworking safely. The idea is that if it seems potentially unsafe, avoid it.
For example, don’t change the blade with the saw plugged in. Don’t reach over the top of a spinning blade to grab a cut off. Don’t free-hand a rip cut without using the rip fence to save time (like I’ve seen done on a construction site).
Using common sense can go a long way with table saw safety, so don’t discredit it.
11. Proper Use Of The Miter Gauge and Rip Fence
Finally, don’t make the rookie mistake of using your miter gauge in combination with your rip fence.
These are made to be used for 2 completely different operations, and not at the same time (there may be a few exceptions, but for basic cuts, this is the case).
If you’re supporting your work piece by holding it securely to the miter gauge, and you’re also running it along side the fence, then once that piece is cut, the cut-off side will be sitting loosely between the blade and the fence.
So it could easily become a projectile at that point.
Instead, use a stop block in combination with your miter gauge and fence to keep this from happening.
A good cross cut sled is also a great idea, and can improve accuracy and consistency with your cross cuts.
For more shop projects that help improve your skills, capabilities, and table saw safety, check out my 9 favorite shop projects here.
Guys if you like what you read, please share it on facebook or save it on pinterest. You can sign up below if you’d like some free templates and project plans, plus updates from this blog.