Watch How To Inlay Wood With A Router, Super Glue, And Mica Powder!
So you want to learn how to inlay wood with a router, and like me, you don’t necessarily want to cut out intricate solid wood inserts to fill the inlay.
Perfect, because that’s what this tutorial is for! I’m going to share all my steps, pictures, and even some video.

I’ve come up with a very simple process for how to inlay wood with a router, using very basic tools and material. (If you don’t know what inlay is, here’s the wiki explanation)
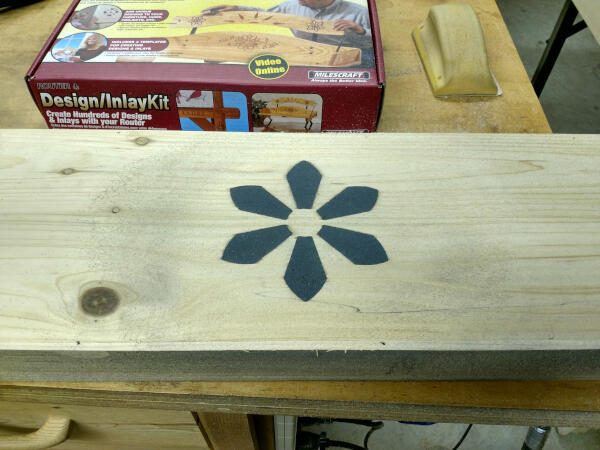
First off, to make the inlay design in the wood, I highly recommend this router inlay kit from Milescraft (affiliate link).
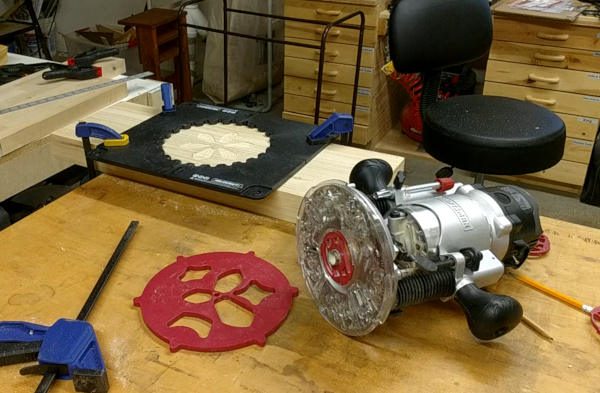
This kit comes with 2 router bits, three different sized bushings, plus a base plate that is a universal fit for any router.
It has the main guide-frame which clamps down to the workpiece. The kit has four different stencil guides that will guide your router using the correct bushing on the included base plate.
It also comes with instructions for applying many different, awesome designs, and how to use the correct stencil to create each one.
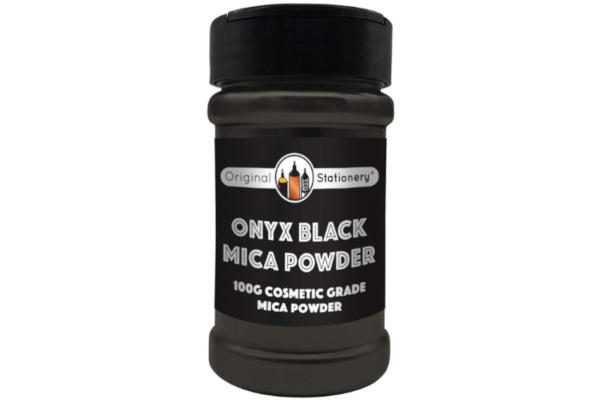
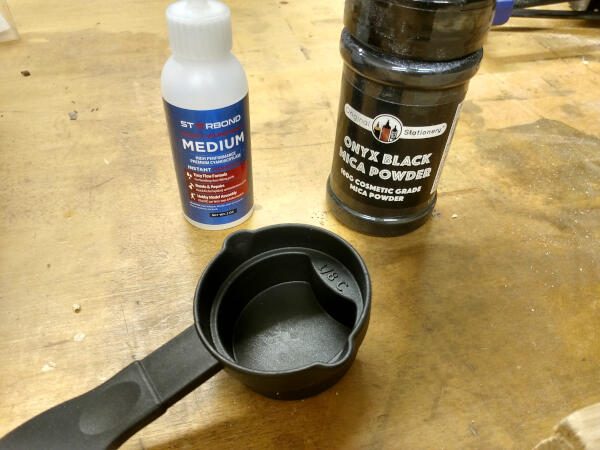
For the inlay material, I use this black mica powder (affiliate link). This is really cool because you can get it in all kinds of colors, and fill in any void for your inlay.
(It’s much more forgiving than cutting a perfect-fitting inlay piece of solid material)
Just a quick note on using this mica powder: It’s a very, very fine powder and to keep it off your skin, use latex or nitrile goves. That way you won’t spread it around to everything else you’re working with.
I’ve read into the potential harmful effects of mica, and it doesn’t seem that bad. You want to avoid inhaling it just because it can cause irritation and coughing. But I didn’t take any special precautions (other than gloves) and it didn’t bother me at all.
If you’re concerned about using mica powder, do your research first. With the wealth of knowledge available to us today online, there’s no reason you should take risks unknowingly, especially if they are beyond your comfort level.
And finally, you’ll need the special ingredient. For my inlays, it’s called Starbond, and it’s a premium quality super glue that comes in various thicknesses.
It’s also available in jet-black, which could be used alone for inlay if you wanted.
Plus it has a 30 month shelf life, which is very impressive for CA glue.
Using CA glue is important on this inlay project because it dries clear, leaving only the mica powder visible.
Plus it bonds well to the mica and to the wood, so the inlay is solid and able to take a power sander without getting destroyed.
And with the incredibly fast drying time, you can really fill in the inlay quickly and get to the final sanding and finishing the same day.
And finally, I love Starbonds medium level variation, as it doesn’t run like regular super glue does.
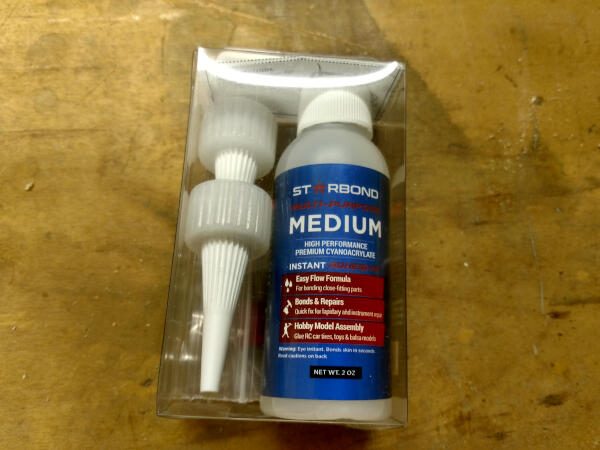
The medium glue fills in voids and holds in place better, while still pulling in the mica powder and getting fully saturated.
This makes the cutout fill up much quicker, compared to laying down fine layer after fine layer, several times, like if you were using regular, thin super glue.
Starbond’s super glue is a specialty glue with an emphasis on wood projects. If you’re serious about doing intricate and decorative projects, this super glue should definitely be involved in your process.
You can buy Starbond’s CA glues here (affiliate link).
How To Inlay Wood With A Router – The Process
For this you’re going to need a nice flat piece of wood to work on, and a router with a plunge base.
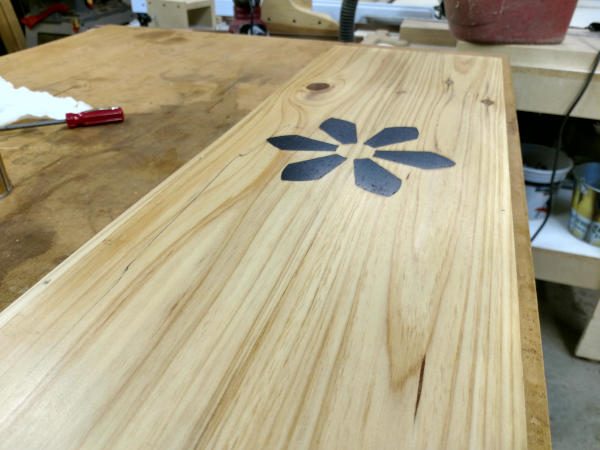
I’ll be creating a basic flower inlay, on a store-bought Pine Shelf (only because I didn’t have any other compatible projects going on at the time).
You can find mica powder in many different colors so if you’re working with darker wood, I suggest using a lighter colored powder. You need a good contrast to make the inlay stand out.
For the depth of this inlay I went with 1/16 of an inch, which may have been deeper than necessary.
I had to go back several times to fill in small voids, and it dries 100% opaque. This tells me the depth of the inlay was more than adequate.
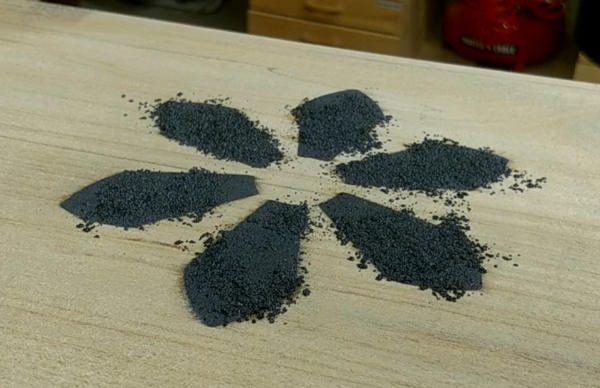
Pour some of the mica powder into a small container like this measuring cup.
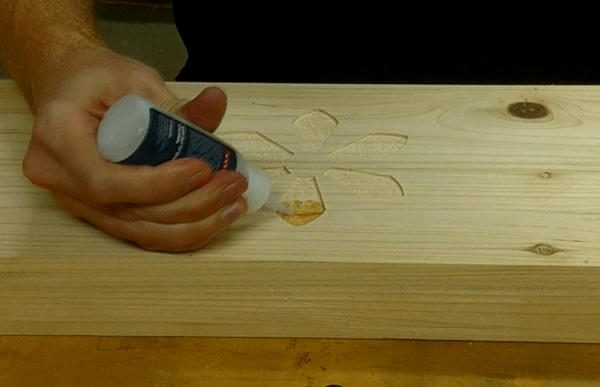
Put a thin layer of CA glue in part of the cutout. This does not need to be thick, or cover a lot of area at one time. You’ll do this in multiple steps / sections.
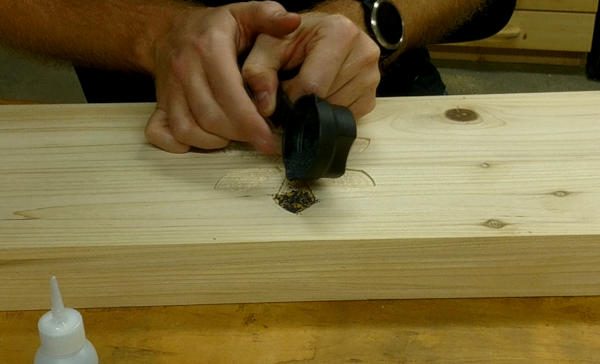
Hold your small container of mica powder at an angle with one hand. Use your other hand to tap the edge, making the powder sprinkle out just enough to lightly coat the glue.
To really thicken it up you can go ahead and put some more glue on top right away, then sprinkle more powder on top of that glue.
Repeat this process until all the low points are filled in.
Do this until you fill all the cut-outs. At this point it will look messy, don’t worry, we’ll fix that.
Let it set for 10 to 15 minutes (if you laid it on very thick), then use a shop-vac to clear off the extra powder from the previous layer.
Once it’s thick enough to fill the cut-out, take an orbital sander and flatten it all out, then clean it with the shop.
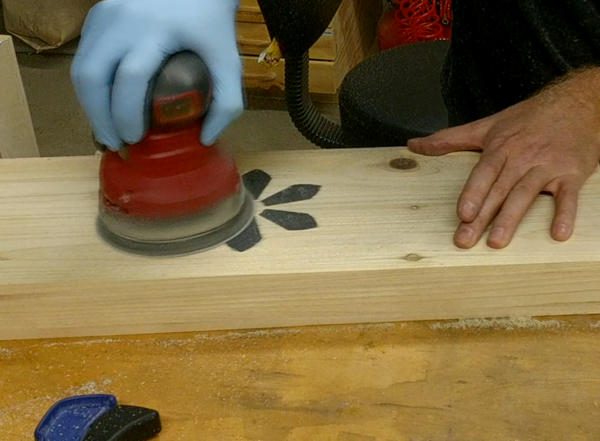
This will expose any remaining voids in the dried-glue/mica-powder mix.
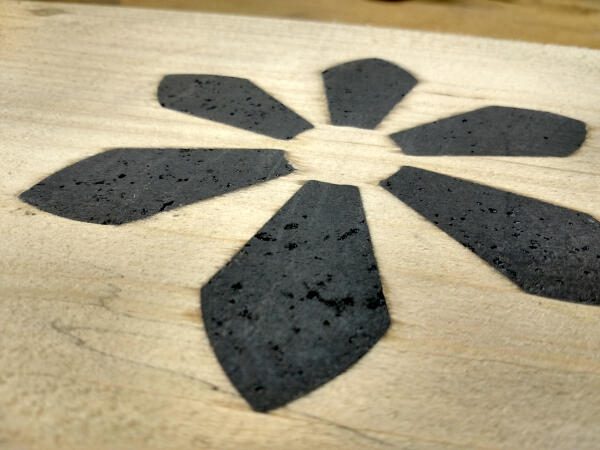
Dab the glue in these voids and sprinkle more mica powder to fill them. Repeat this process, followed by sanding, until there are no more voids left after things are sanded flat and smooth.
If you manually sand it using a sanding block, the mica powder spreads around and tints the wood, like this:
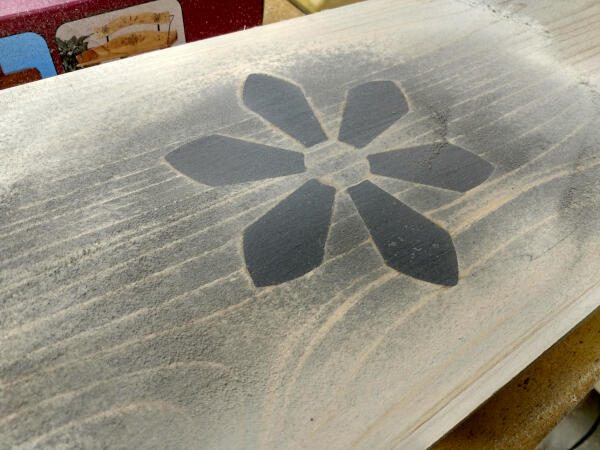
To avoid this, use an orbital sander with a vacuum attached to it.
This will keep the powder from blending into the wood and leave a nice crisp inlay once the sanding is complete.
Once you’ve glued in enough mica to fill all the voids, and you have it sanded flush through at least 180 grit sandpaper, you’re ready to apply a finish and complete the project.

For mine, I used 7 coats of wipe-on satin poly, which I applied out over 2 days. I dry-sanded after 3 coats.
(Click here to learn how to apply wipe-on polyurethane)
Here’s a video of the entire inlay process from start to finish:
Be sure to sign up below to get wood project tips, plans, and blog updates from me, directly to your inbox!
Related:
How To Apply Wipe On Poly
Click Here To Get This Awesome Super Glue (affiliate link)
All About Beginner Woodworking
Get The Look You Want From a Polyurethane Finish